Blazor is a new web UI framework based on C#, Razor, and HTML. This runs in the browser via WebAssembly. It helps build interactive web UI using C# instead of JavaScript. This post demonstrates how to build a SPA using Blazor. Blazor simplifies the task of building fast and beautiful SPAs that run in any browser. It does this by enabling developers to write Dotnet based web apps. These apps run client-side in web browsers using open web standards. Let’s get started with Blazor.
In this post, we will discuss the following
- Hosting Models
- Enable Authentication and Authorization
- Dive deep into Default Blazor pages
Prerequisites
- Visual Studio 2019
- Install .NET Core 3.0
- Install Blazor Templates
Hosting models
You have two options to host the app. First, in the server as razor components. Next is run the app in the browser as Web Assembly.
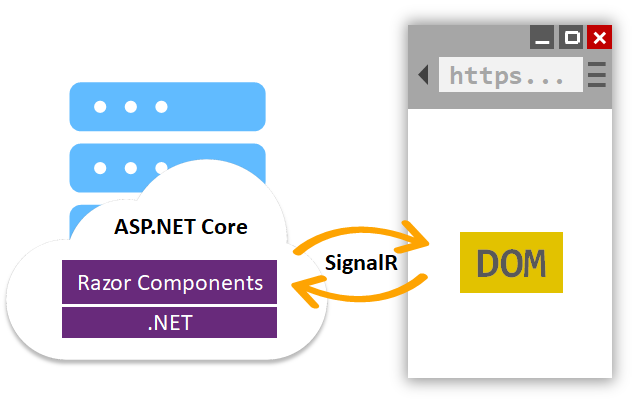
Server-side
Supports hosting Razor components on the server inside an ASP.NET core app. User Interactions will be handled over a SignalR connection.
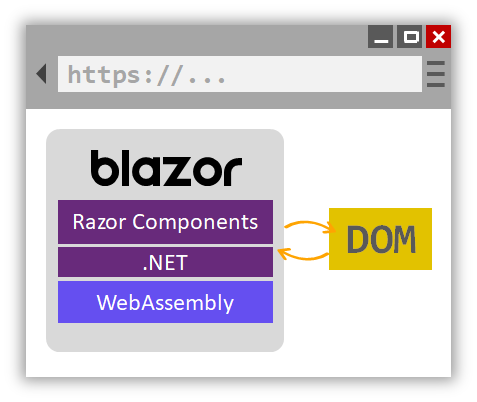
Client-side
The Blazor app along with the .NET runtime and other dependencies downloaded to the browser. Additionally, you can share the model, validation and other business logic between client and server-side. Moreover, you can also take advantage of several libraries that will run directly in .NET on the browser.
Obviously, each of the models has its own benefits and downsides. Particularly, most of them are related to dependency, performance, browser compatibility, etc. The decision of choosing one of the approaches for implementation is up to you. We will discuss server-side hosting with an example in this post. However, the decision of one over the other is not the main purpose of this post.
Get Started
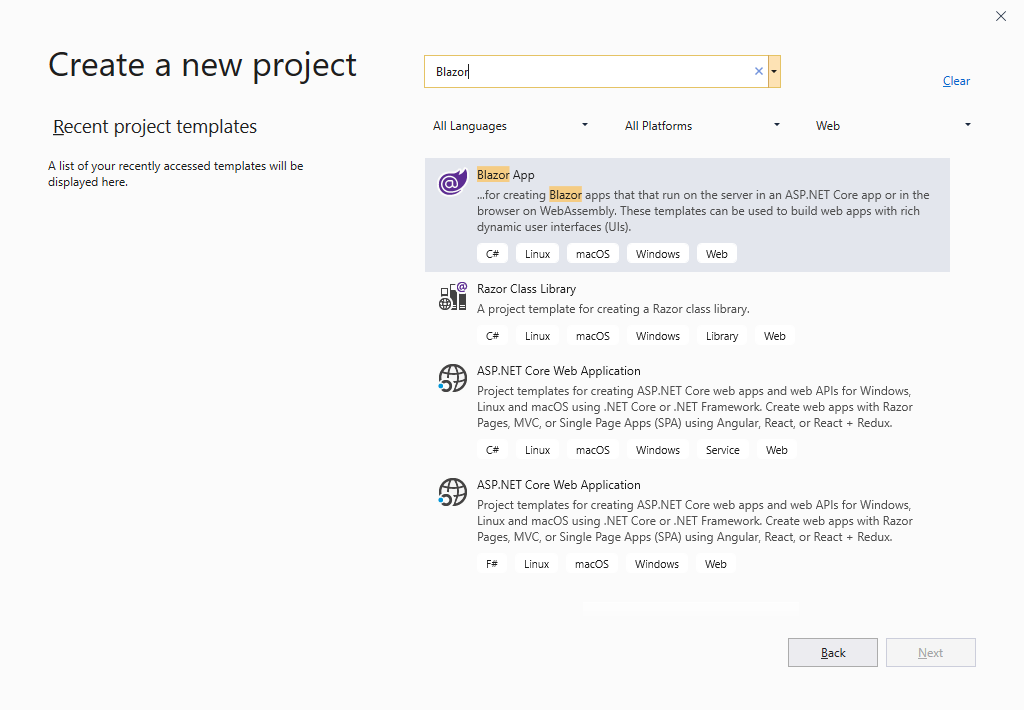
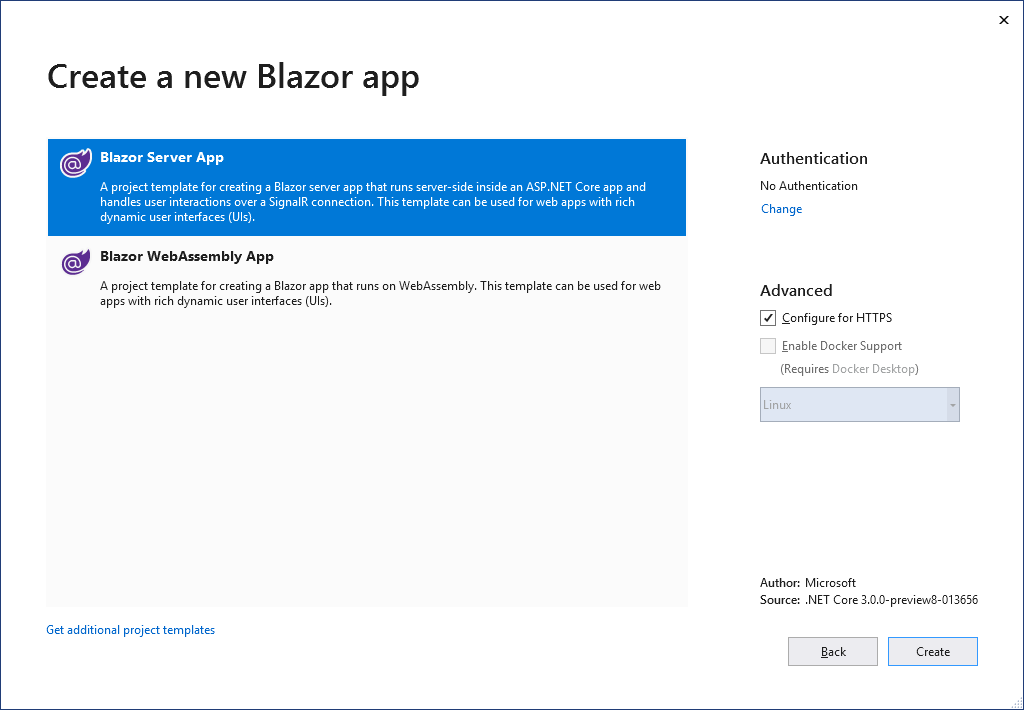
First, search for “Blazor” when creating the new project and select “Blazor App”.
On the next page, select the type of app you want to create. I am going to create a “Blazor Server App” for the purpose of this post.
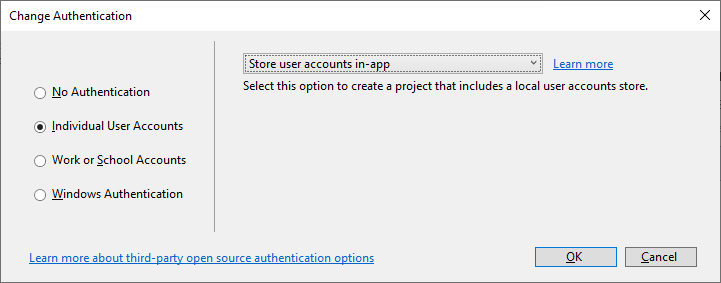
Before creating the project, click the “Change” link under the “Authentication” section. Select “Store user accounts in-app”. This option lets us use a local user accounts store for authentication. Other options available are No Authentication, Work or School Accounts and Windows Authentication. You can disable the HTTPS from the properties page (Debug tab) of the project later.
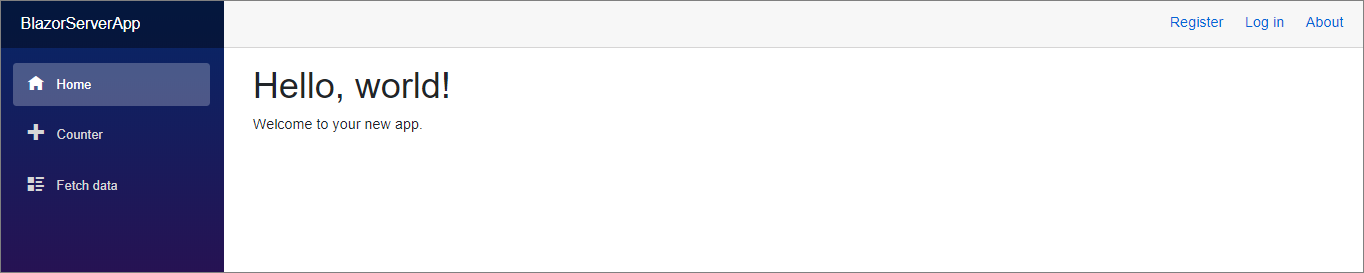
Now we have created the project with authentication enabled. When you run the project, you can see the following screen.
Understanding the project structure
The structure of the project has some components similar to an MVC application. You can see Areas, appsettings.json, Program.cs, and Startup.cs. In addition to that, you can also see files with razor extension and they are specific to “Blazor”. Let’s talk about them in detail.
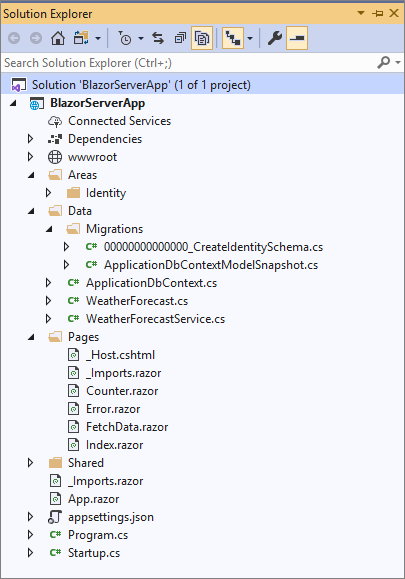
Identity – This folder was created because we have selected an authentication methodology while creating the project. It has an “AuthenticationStateProvider” class and HTML files for Login and Logout.
Data – Nuget packages related to Entity Framework are available by default while creating the project. This folder contains a migration file to create tables related to authentication like Users, Roles, etc. Along with this, it also contains the “DbContext” file, a model and service. The service gets the weather forecast details for the default demo page.
Pages – If you are a .NET developer, you may already hear about the razor. Blazor apps are based on components. Components are reusable building blocks. It can be an individual control or a block with multiple controls. These component classes are written in razor markup. However, the main difference of razor in the context Blazor is, it is built around UI logic and not on request/response delivery.
Enable Authentication and Authorization
To enable the authentication, do the following steps
- Create the tables to store user and role details
- Add User and Roles
- Implement authorization
Create tables
Run the Entity Framework’s “update-database” command to trigger the table creation. By default, the application creates the database in “localdb”. Alternatively, you can modify the connection string in appsettings.json if required. The default migration creates tables related to authentication like AspNetUsers, AspNetRoles, etc.
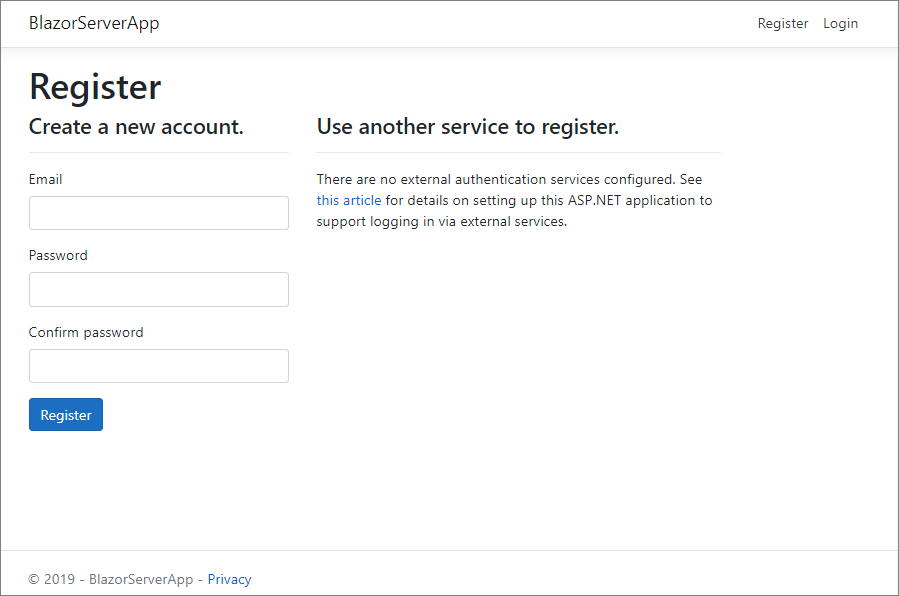
User Registration
You can add users to the application in two ways. First option is to use the “Register” UI. This will help add the user to the system.
Next option is to seed the User and Role data from “Startup.cs”. Role services are not added by default but can be added with AddRoles<TRole>(). Importantly, you have to modify the “ConfigureServices” method to enable Roles.
public void ConfigureServices(IServiceCollection services)
{
    services.AddDbContext<ApplicationDbContext>(options =>
        options.UseSqlServer(
            Configuration.GetConnectionString("DefaultConnection")));
    services.AddDefaultIdentity<IdentityUser>()
        .AddRoles<IdentityRole>()
        .AddEntityFrameworkStores<ApplicationDbContext>();
    services.AddRazorPages();
    services.AddServerSideBlazor();
    services.AddScoped<AuthenticationStateProvider, RevalidatingAuthenticationStateProvider<IdentityUser>>();
    services.AddSingleton<WeatherForecastService>();
}
I use the following method to seed both Roles and Users in the Identity tables. The method is called inside the “Configure” method of “Startup.cs”. It uses RoleManager and UserManager to check and add Roles and Users.
private async Task CreateUserAndRoles(IServiceProvider serviceProvider)
{
    //initializing custom roles
    var RoleManager = serviceProvider.GetRequiredService<RoleManager<IdentityRole>>();
    var UserManager = serviceProvider.GetRequiredService<UserManager<IdentityUser>>();
    string[] roleNames = { "Admin", "User" };
    IdentityResult roleResult;

    foreach (var roleName in roleNames)
    {
        var roleExist = await RoleManager.RoleExistsAsync(roleName);
        if (!roleExist)
        {
            //create the roles and seed them to the database: Question 1
            roleResult = await RoleManager.CreateAsync(new IdentityRole(roleName));
        }
    }

    IdentityUser user = await UserManager.FindByEmailAsync("[email protected]");

    if (user == null)
    {
        user = new IdentityUser()
        {
            UserName = "[email protected]",
            Email = "[email protected]",
        };
        await UserManager.CreateAsync(user, "Test@579");
    }
    await UserManager.AddToRoleAsync(user, "Admin");


    IdentityUser user1 = await UserManager.FindByEmailAsync("[email protected]");

    if (user1 == null)
    {
        user1 = new IdentityUser()
        {
            UserName = "[email protected]",
            Email = "[email protected]",
        };
        await UserManager.CreateAsync(user1, "Test@246");
    }
    await UserManager.AddToRoleAsync(user1, "User");

}
Implement Authorization
Now we have created the tables, add users and roles. Let’s enable authorization to pages. Blazor has an “AuthorizeView” component for authorization purposes. This component helps display content depending on the authorization status. If you have the page content inside “AuthorizeView”, only an authorized user can see it.
<AuthorizeView>
    <h1>Counter</h1>
    <p>Current count: @currentCount</p>
    <button class="btn btn-primary" @onclick="IncrementCount">Click me</button>
</AuthorizeView>
What if you need to show different content for authorized and unauthorized users? You can use “Authorized” and “NotAuthorized” elements inside “AuthorizeView”. This helps serve different content based on the authorization status.
<AuthorizeView>
    <Authorized>
        <h1>Counter</h1>
        <p>Current count: @currentCount</p>

        <button class="btn btn-primary" @onclick="IncrementCount">Click me</button>
    </Authorized>
    <NotAuthorized>
        You are not authorized to view this page!
    </NotAuthorized>
</AuthorizeView>
You can authorize users based on Role or Policy. To implement that you have to mention the Policy and Roles as attributes inside the “AuthorizeView” element. You can also use the “Authorize” attribute. The name of the roles and policy mentioned inside AuthorizeView is case sensitive.
<AuthorizeView Roles="Admin">
    <Authorized>
        <h1>Counter</h1>
        <p>Current count: @currentCount</p>

        <button class="btn btn-primary" @onclick="IncrementCount">Click me</button>
    </Authorized>
    <NotAuthorized>
        You are not authorized to view this page!
    </NotAuthorized>
</AuthorizeView>
Dive deep into Blazor Pages
Let’s analyze a razor component and try to understand the basic building blocks of it. I am going to use “FetchData.razor” for this.
@page "/fetchdata"

@using BlazorServerApp.Data
@inject WeatherForecastService ForecastService

<h1>Weather forecast</h1>

<p>This component demonstrates fetching data from a service.</p>

@if (forecasts == null)
{
    <p><em>Loading...</em></p>
}
else
{
    <table class="table">
        <thead>
            <tr>
                <th>Date</th>
                <th>Temp. (C)</th>
                <th>Temp. (F)</th>
                <th>Summary</th>
            </tr>
        </thead>
        <tbody>
            @foreach (var forecast in forecasts)
            {
                <tr>
                    <td>@forecast.Date.ToShortDateString()</td>
                    <td>@forecast.TemperatureC</td>
                    <td>@forecast.TemperatureF</td>
                    <td>@forecast.Summary</td>
                </tr>
            }
        </tbody>
    </table>
}

@code {
    WeatherForecast[] forecasts;

    protected override async Task OnInitializedAsync()
    {
        forecasts = await ForecastService.GetForecastAsync(DateTime.Now);
    }
}
@page – The route attribute in a component is set using “@page” attribute. This specifies that the component is a routing endpoint. A component can have multiple route attributes by having multiple “@page” directives.
@inject – You can inject the services into the component using the “@inject” attribute. In the example, “WeatherForecastService” is injected and later used to retrieve the data. You can use the services from registering them in “Startup.cs” also similar to ASP.NET MVC.
@code – This block contains the code for rendering and event handling. It can be anything like variable declarations to methods. There is something similar to “@code” which is “@functions” and used for the same purpose. From ASP.NET Core 3.0, it is suggested to use “@code” instead of “@function”.
Summary
In short, this post tried to provide an introduction of Blazor and how to create your first application with Blazor. In addition to that, we also discussed the hosting models, implementation of authentication, authorization and the directives used in the default pages.
The full implementation of this post will be available in Github
Next up
Watch this for more posts on Blazor. Some of the posts I am planning to write are
- CRUD using EF Core with Modal dialogs
- Validation in Blazor
- Containerization of a Blazor app
- Routing with Blazor
Recommended Courses
- Blazor: Getting Started
- Creating Blazor Components
- Designing and Building Enterprise Blazor Applications
We may receive a commission for purchases made through these links.
Further reading
The following are some of the links you can refer to if you want to learn more about Blazor.


The method CreateUserAndRoles(IServiceProvider serviceProvider) has severe restrictions as I found trying many combinations to add more users in User or Admin roles but it fails always with the Foreign Key violation errors:
KEY Constraint “FK_AspNetUserRoles_AspNetUsers_UserId. The conflict occurred in the database …………… table
“dbo.AspNetUsers”
I also created a Manager role and tries to add an user to it but failed with the above error.
I looked through the table data’s in an effort to resolve the issue but in vain
It though worked as it was without changes. Any Ideas why?
Thanks
Please ignore my comments above. I have sorted it out at my end with a slight variation. Thanks for the article.
How is the CreateUserAndRoles method call from the Config method in Startup?
ie what is the correct service provider?
Sorry found out already from your github
CreateUserAndRoles(serviceProvider).Wait();