Most of us use NuGet packages in our projects and we are familiar with the procedure of adding a NuGet package to a project. Have you ever wondered how to create NuGet package? Let’s discuss in detail how to create and publish NuGet Package.
Introduction to NuGet
NuGet is a free and open-source package manager designed for the Microsoft development platform. It is a .NET alike of NPM packages. A whole library can be encapsulated into a single package file that can be added to any project to provide access to the methods and classes that the libraries expose. In summary, think of it like a DLL or a Class library project which can be added as a reference to any project and provide access to the methods it has.
Technically speaking, a NuGet package is just a ZIP file that’s been renamed with the .nupkg extension and whose contents match certain conventions. To easily examine any package’s contents, change the extension to .zip and expand its contents as usual. Just be sure to change the extension back to .nupkg before attempting to upload it to a host – Microsoft Docs
Getting started
You must use either nuget.exe or dotnet.exe depend on the project style to package the functionality and create NuGet package. Refer to the following table (Source – Microsoft Docs) to find which CLI tool to use for your project.
| Project | Default Project Format | CLI Tool | Notes |
| .NET Standard | SDK Style | dotnet CLI | Projects created prior to VS 2017 are Non-SDK style. Use nuget.exe CLI |
| .NET Core | SDK Style | dotnet CLI | Projects created prior to VS 2017 are Non-SDK style. Use nuget.exe CLI |
| .NET Framework | Non SDK Style | nuget.exe CLI | .NET Framework projects created using other methods may be SDK-style projects. For these, use dotnet CLI instead. |
| Migrated .NET Project | Non SDK Style | To create NuGet package, use msbuild -t:packto create packages | To create nuget package, msbuild -t: pack is recommended. Otherwise, use the dotnet CLI. Migrated projects are not SDK-style projects. |
- This post describes how to create NuGet package and publish it using dotnet CLI.
Prerequisites
- dotnet CLI – see Install NuGet client tools. Starting in Visual Studio 2017, the dotnet CLI is included with .NET Core workloads.
- .NET Core 2.2 SDK
- Visual Studio 2017/2019
Project setup
- Create a new blank solution in Visual Studio
- Next, add a project of type “Class Library” and name it as “LoggerUtility”.
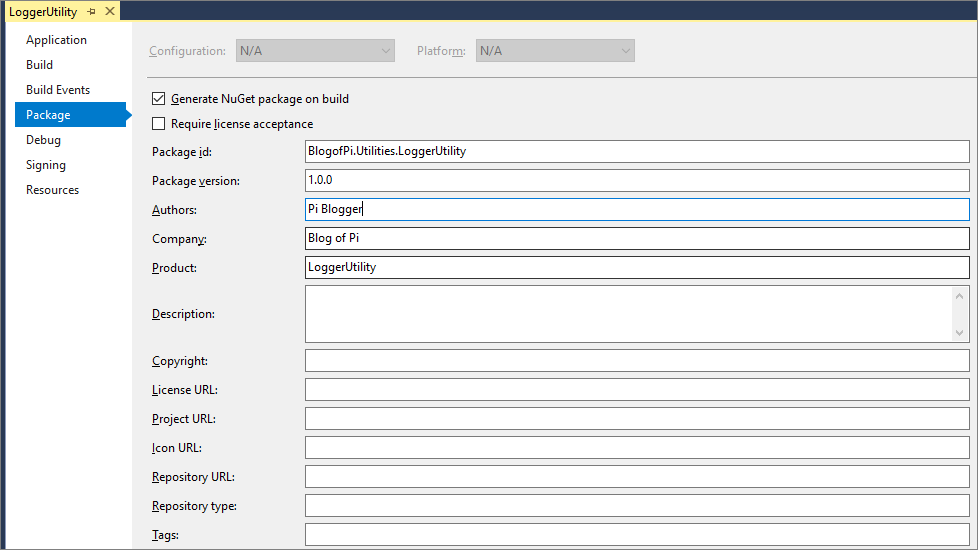
Set the following values on the project property
- Package id – Unique identifier
- Package version – Relates to the assembly version
- Authors
- Company
Create a package
You can create NuGet package either by run the pack command, set the “Generate NuGet package on build” property to automatically create NuGet package on build or through Solution Explorer.
1. Package creation on build
When you set the “Generate NuGet package on build” property in project properties, the package will be automatically created on every build. In this case, the time to pack increases the build time for your project.
2. Package creation by command
You can use “dotnet pack” command to build the project and generate the NuGet package. If you have more than one project (I have a class library and a console application in one solution), this command creates NuGet packages for both of them. You can avoid this in two different ways. The first option is to mention the relative path of the project you want to pack in the “dotnet pack” command.

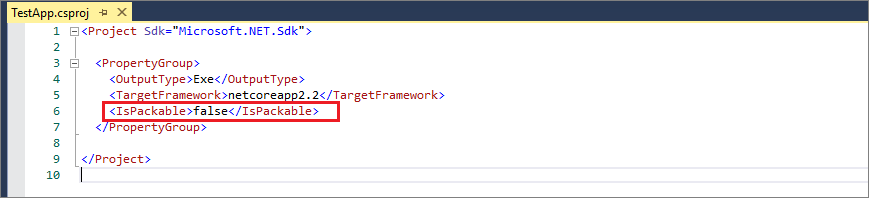
The next option is to set “IsPackable” property to false for the application you don’t want to pack. You can set the property by editing the “csproj”. Web applications are not packable by default.
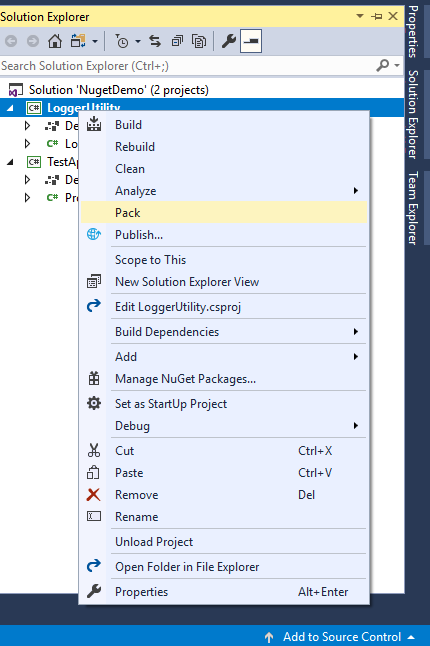
3. Package creation from Solution Explorer
You can pack a project easily with right-clicking the specific project and click “Pack” from Solution explorer
Publish the NuGet package
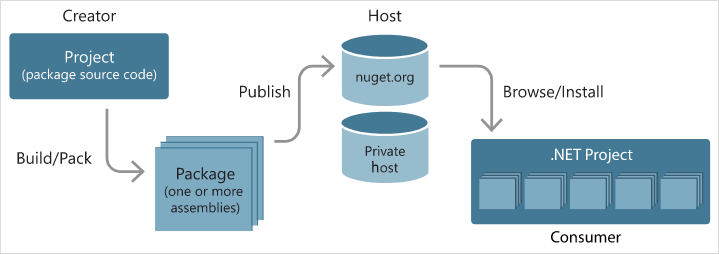
Now you know how to create NuGet package. The next step is to make it available to the developers. You can publish the package in nuget.org and make it publicly available to everyone or share it with a limited audience through a file share or other options like the private NuGet server.
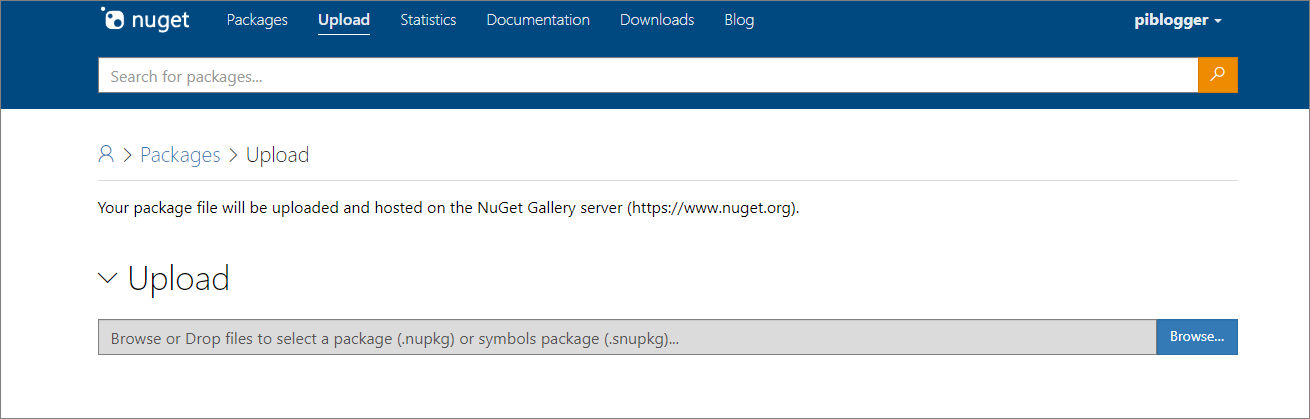
To publish in nuget.org, you need a Microsoft account. You can upload the package directly on the nuget.org website or push the package using API keys.
1. Upload package
2. Command-line
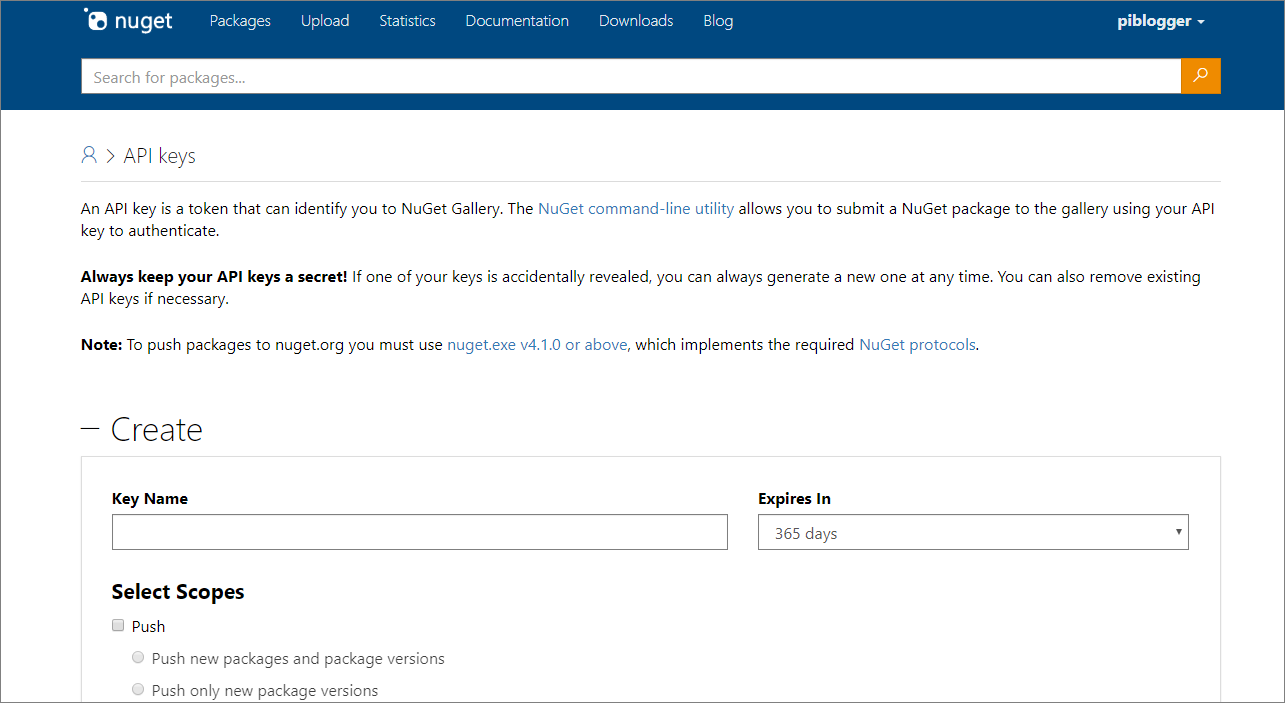
You need an API key to publish the package from the command line or publish as part of the CI/CD process. After login to the nuget.org website, you can create your key by select the user name and then select API keys. Make sure you copy the keys after creation as it will not be available later.
You can use the “dotnet nuget push” command now to publish the package into nuget.org. The format of the command should be as below
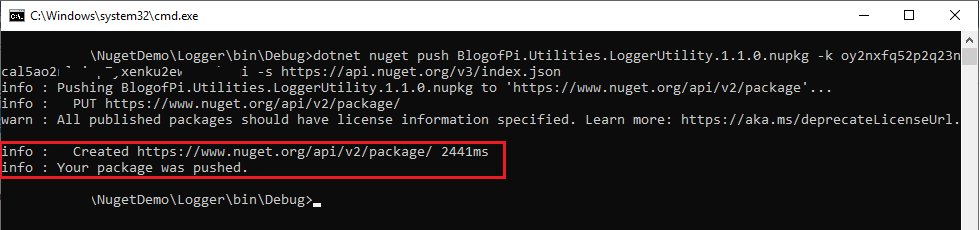
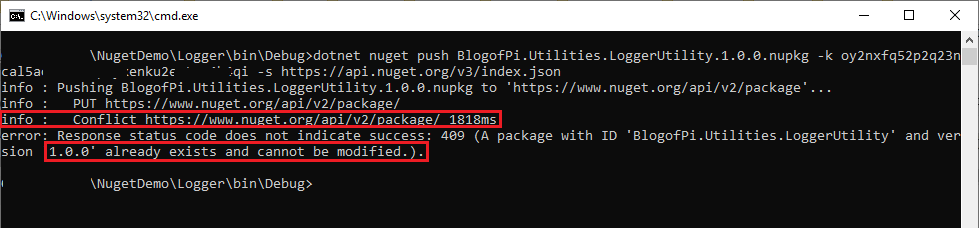
The package name also contains the version number at the end. If you try to upload the package which is already uploaded, then you will get the following error.
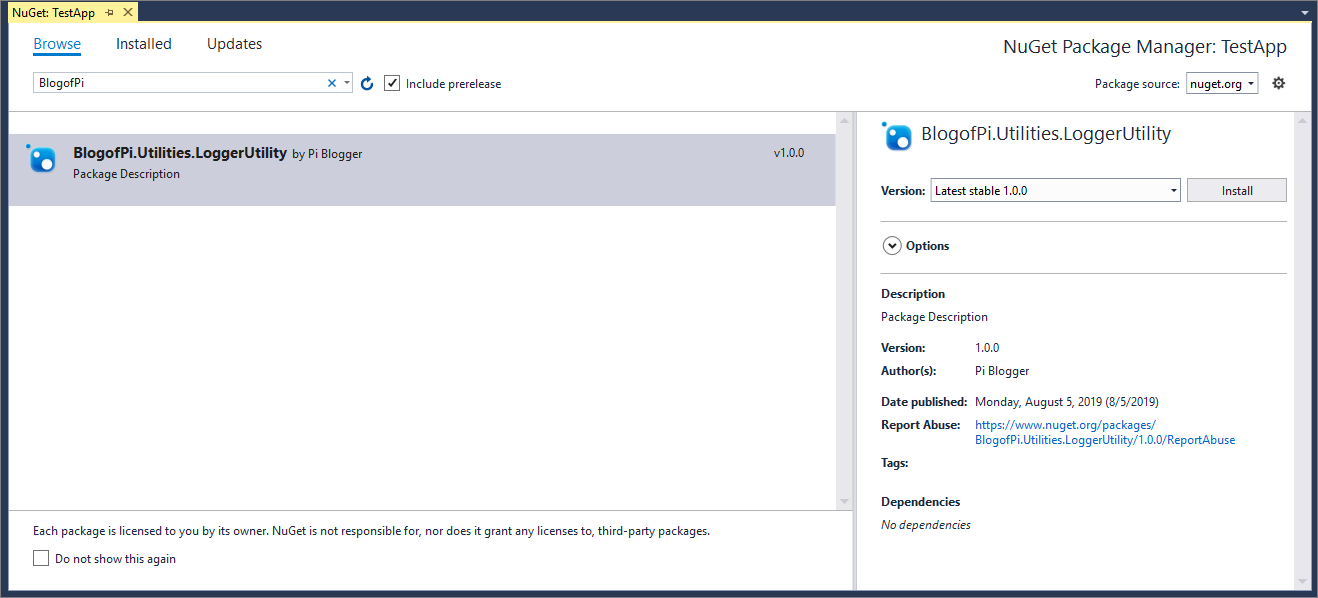
Consume the package from NuGet Package Manager
You can consume the NuGet package by simply search on its name in NuGet package manager like any other NuGet packages.
Advantages
A NuGet package is just a container and may have one or more libraries. It includes, among other things, the binaries needed, but more importantly it also includes versioning and dependencies so you can ensure that anything else required to make that package work with your project will also get downloaded and installed.
Once the package is created, it can be shared with the public or to a restricted audience. It also helps enterprises build their own private NuGet repository to share all the privately build NuGet packages.
In addition to the points we discussed, another advantage of using the NuGet package system is that it tracks it all for you, so you don’t have to track the files that the NuGet package added, place them in special folders, make sure they get copied in your builds. Also, it notifies you if your added packages received an update, it removes the files and unreferenced them if you take the package off your project.
Packaging guidelines
Always choose a unique package identifier and set the version number. It is good to follow Package principles while creating NuGet packages listed below.
- All the functionalities that tend to be reused together can be built in the same package together
- Functionalities that are unrelated to the purpose of the package should not be included
- The package should not have more that one reason to change
- Functionalities that are likely to change together should be package together
Summary
This article tried to provide a summary of creating NuGet package and publish it. We discussed create NuGet package using dotnet CLI and publish it to nuget.org.