Serverless architecture also called as Function-as-a-Service is an event-triggered computing model. “Serverless” doesn’t mean there are no servers. They are abstracted so the developers are free from having to manage servers and enable them to focus on writing code. Serverless code is event-driven and the trigger can be anything from an HTTP request to a Blob. I will talk about Microsoft Azure’s serverless offering Azure Functions in this post. Let’s get started with Azure Functions.
Some of you may have a question. Isn’t the same problem PaaS also solves. Not worrying about the infrastructure, servers, and others. You are right. PaaS does solve the issues, but there are some major differences between these two. PaaS provides more control over the deployment environment compare to serverless. Scaling is automatic in serverless but in PaaS, you have to configure it manually. In PaaS, the application takes time to spin up while serverless executes only when invoked.
I am going to create an Azure Function app that generates a GUID and returns to the user on an HTTP request.
Create the Function App
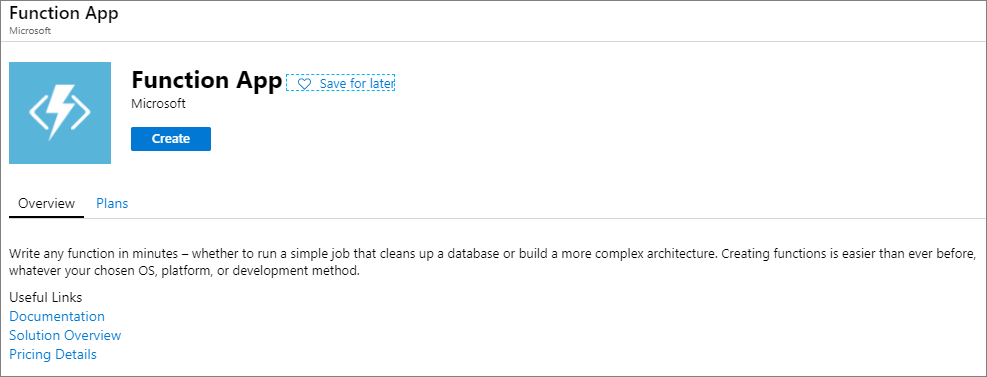
Login to the Azure portal and search for “Function App”
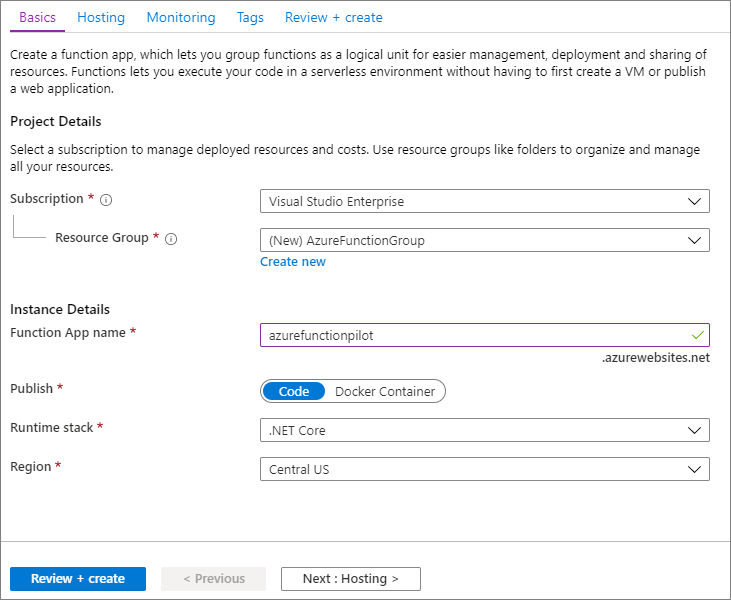
Click on the “Create” button will take you to the wizard. In the “Basic” section, fill in the details for your Function App name. The name must be unique.
You have the option to publish the app in a container. Use the option “Code” for publishing now. I have selected the runtime stack as .NET Core. This setting creates a function project that supports .NET Core. Once you filled the values click on “Hosting”
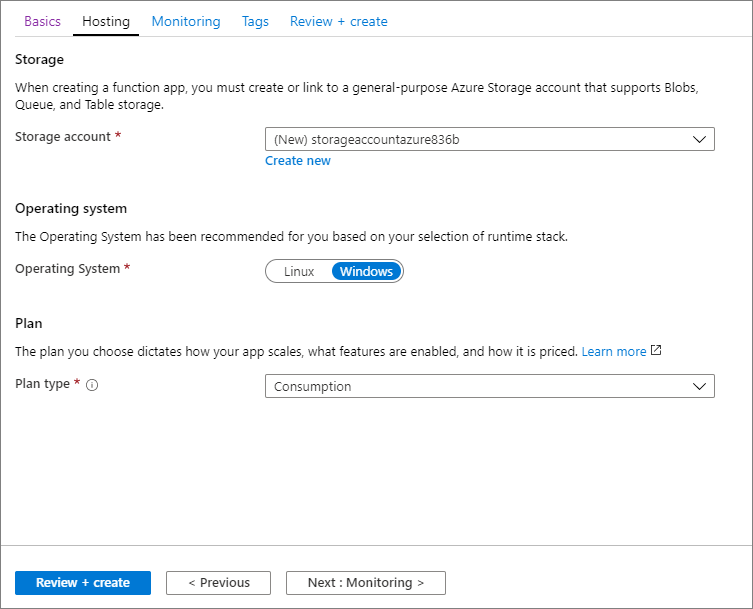
Now you see the hosting screen. You must mention a storage account name used by the function app. You have the option of using an existing account or create a new one.
Plans
Next, you must select the plan type. The default option is Consumption. In this option, the resources are added dynamically as and when required. The other options available are Premium and Dedicated (App Service).
Both Premium and Consumption plans automatically add compute power as and when required. While the Premium plan provides additional features such as premium compute instances and VNET connectivity, the App Service plan provides access to the underlying infrastructure. You should choose your option based on your requirements.
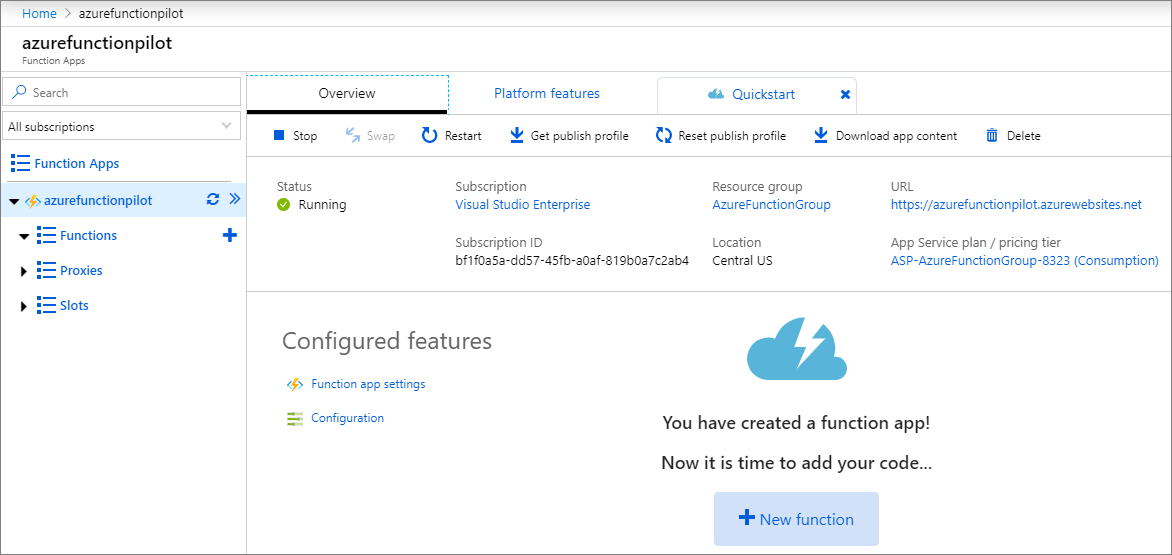
I haven’t configured monitoring for the Azure function and created the function. When I navigate to the Function app, I can see the screen as below with an option to create a new function.
Create the Function
We have created the function app now. Let’s create a function. You can create the function using Visual Studio, VS Code or any other IDEs of your choice. The quicker way to author function is using the portal itself. You can also use the Azure Functions project template in Visual Studio and then publish it to a Function app in Azure.
Click on the “+” button, choose “HTTP trigger”. Provide a name for the function and select an authorization level.
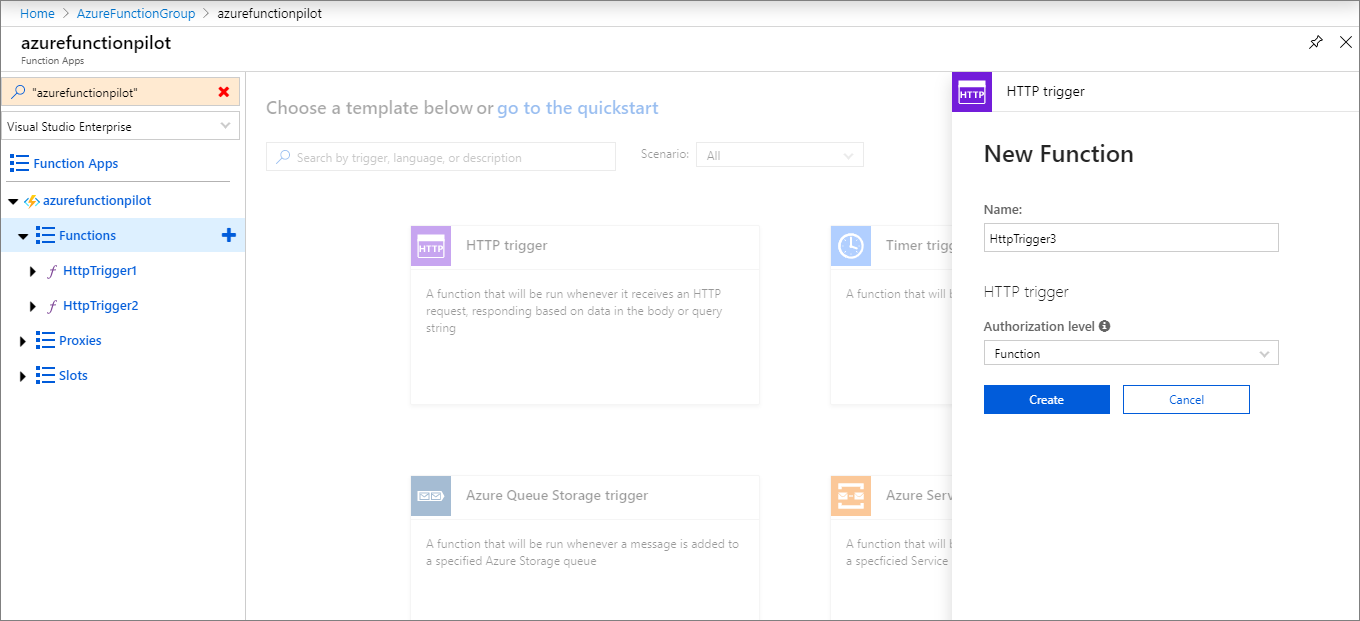
Authorization Level
Authorization level controls whether the function requires an API key. The available authorization levels are as below. The Function uses a function key and Admin uses the master key. The keys are found in the keys management panel of the portal.
- Function
- Anonymous
- Admin
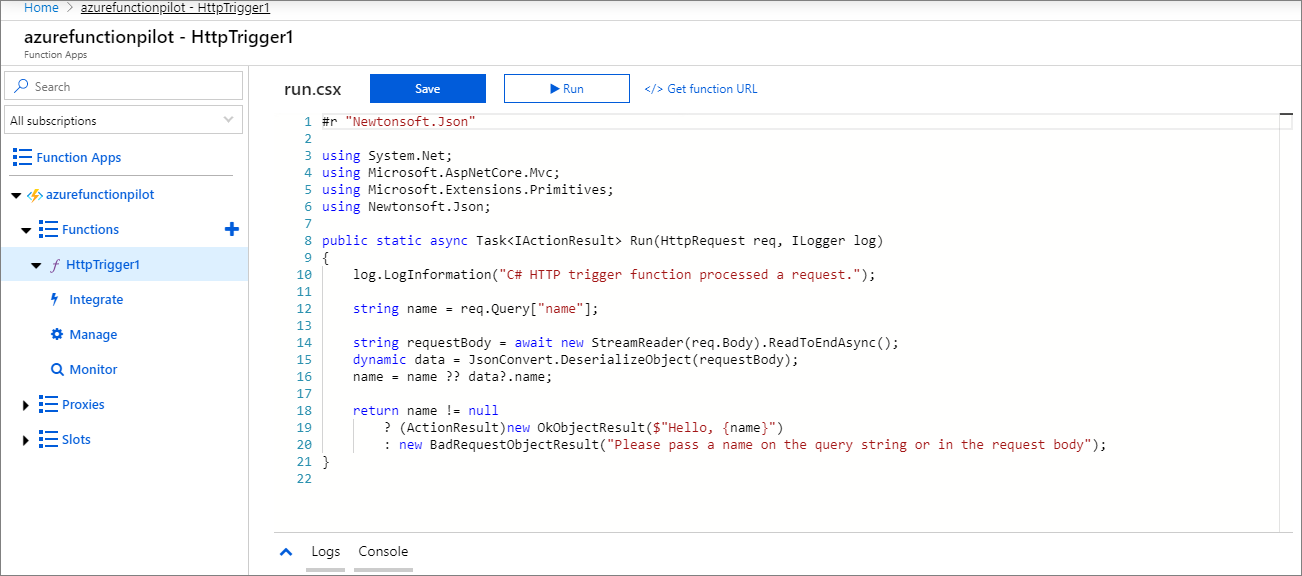
After creation, you will see the code for the Function App in the portal.
Before making modifications to the code for GUID generation, I want to test the functionality. Let’s get the URL of the function and test it in Postman.
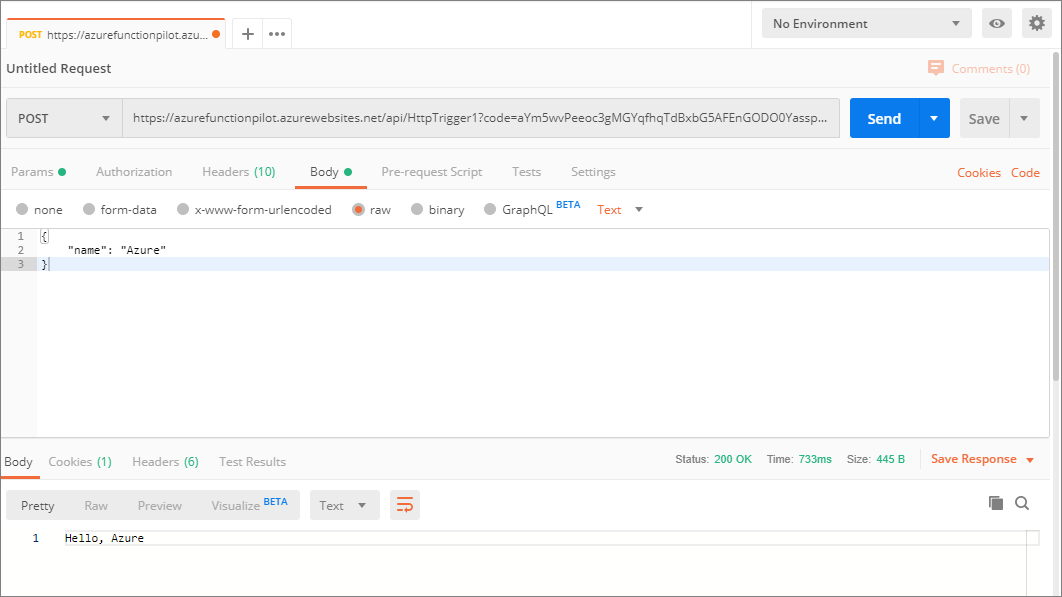
It is a POST request in which I passed the name “Azure”. The response from the function is just “Hello, Azure”.
Now, let’s modify the code to respond with GUID for a GET request. I have added “System” namespace and the code to create GUID inside the function.
#r "Newtonsoft.Json"
using System.Net;
using Microsoft.AspNetCore.Mvc;
using Microsoft.Extensions.Primitives;
using Newtonsoft.Json;
using System;
public static async Task<IActionResult> Run(HttpRequest req, ILogger log)
{
Guid id = Guid.NewGuid();
return new OkObjectResult(id);
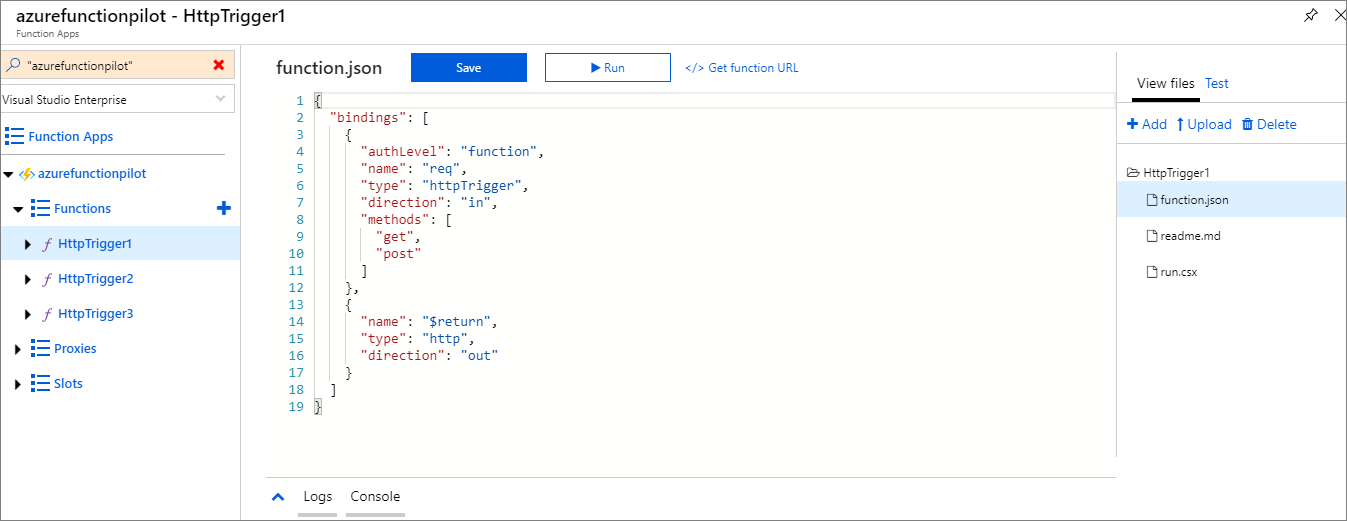
}You may wonder where the request method is configured as “GET”. The request method along with other configuration information like authentication level is stored in “function.json”.
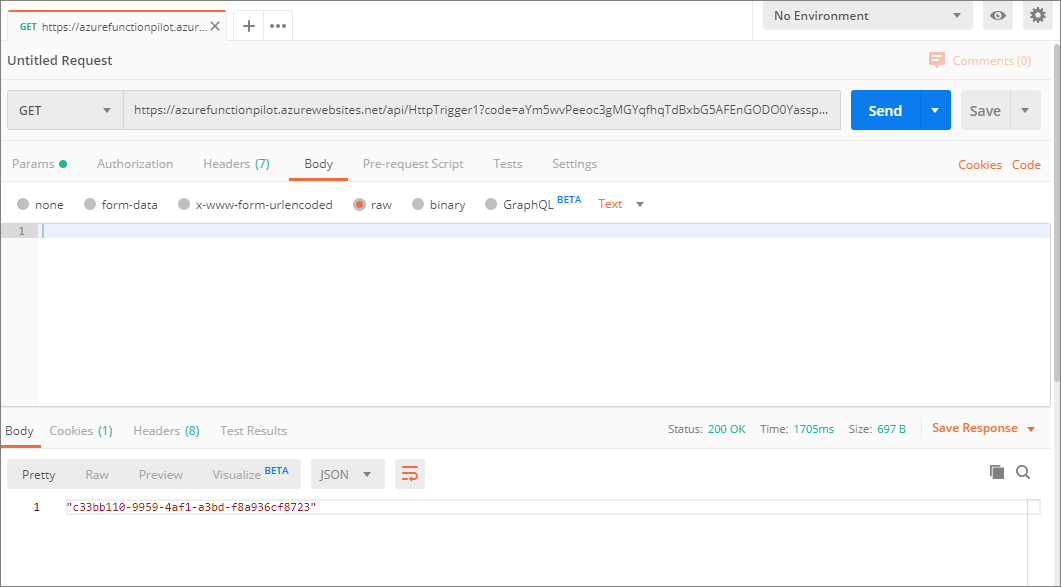
Testing the modification
Let’s test the function in Postman now. You can see the request method is “GET” now and the GUID in response.
Okay, we talked about creating an Azure Function which returns a GUID on an HTTP request. Other than the HTTP trigger, there is a list of other options available to select from.
Available triggers
- Timer
- Queue Storage
- Service Bus Queue
- Service Bus Topic
- Blob Storage
- Event Hub
- Cosmos DB
- IoT Hub
- SendGrid
- Azure Event Grid
You can create the function app in other languages like JavaScript, Java, Powershell, Python, and TypeScript.
Summary
Azure Functions help execute the code in a serverless environment without having to create a VM or Web application. In this post – Get started with Azure Functions, you learned how to create an Azure Function in C# and use HTTP Trigger to call it.
Further reading
The following are some of the links you can refer to if you want to get started with Azure Functions.